Risk Overrides
Risk overrides allow you to override a customer or entity's computed risk level with a manually or automatically set level. This covers manual overrides, monitoring rule overrides, override floors, external factor overrides, initial risk imports from transactions, and clearing overrides.
How Risk Overrides Work
Risk overrides are stored on a Risk Assessment step as three fields:
| Field | Description |
|---|---|
override_risk_level |
The overridden risk level (Low, Medium, High) |
override_rule |
What set the override (e.g. "Manual Override", a monitoring rule key, "Initial Import") |
override_expires_at |
When the override expires (ISO 8601 datetime) |
When a risk override is active, the
overall_risk
field on the Risk Assessment is forced to the override level. If the override
expires (or is cleared), risk is recalculated from scratch based on the
underlying dimension scores.
Overrides are preserved across automated recalculations — the system carries forward any active override (including manual overrides) into the new assessment as long as it hasn't expired and the recalculated risk isn't already higher.
Manual Overrides
A manual override is set by a user directly on a Risk Assessment via the Set Override button.
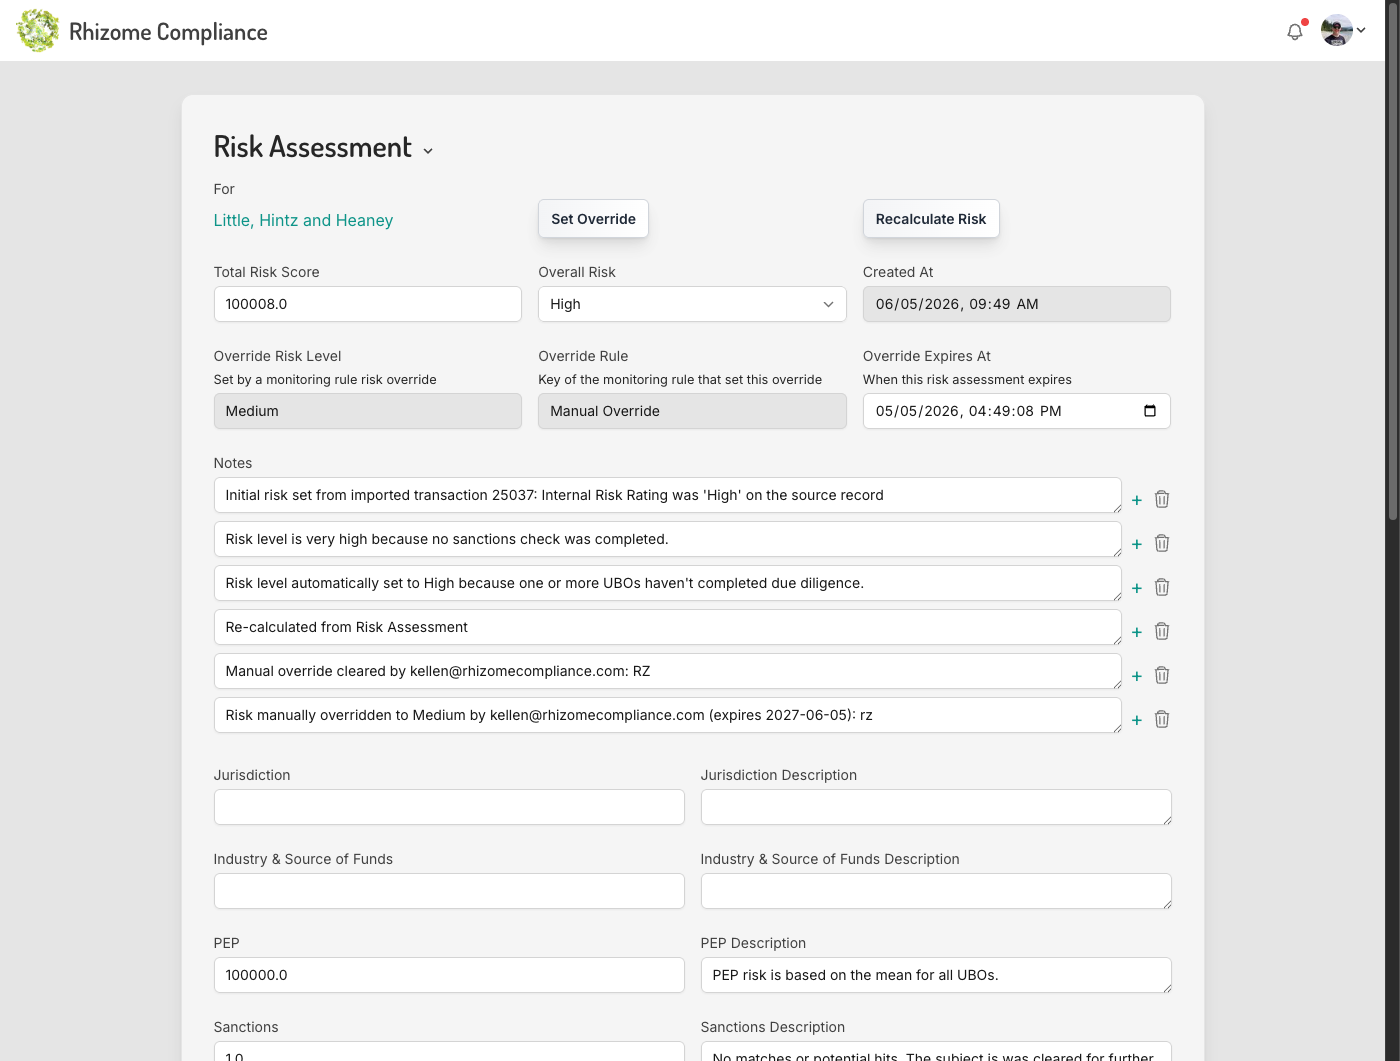
Setting a Manual Override
- Navigate to the Risk Assessment for the customer or entity
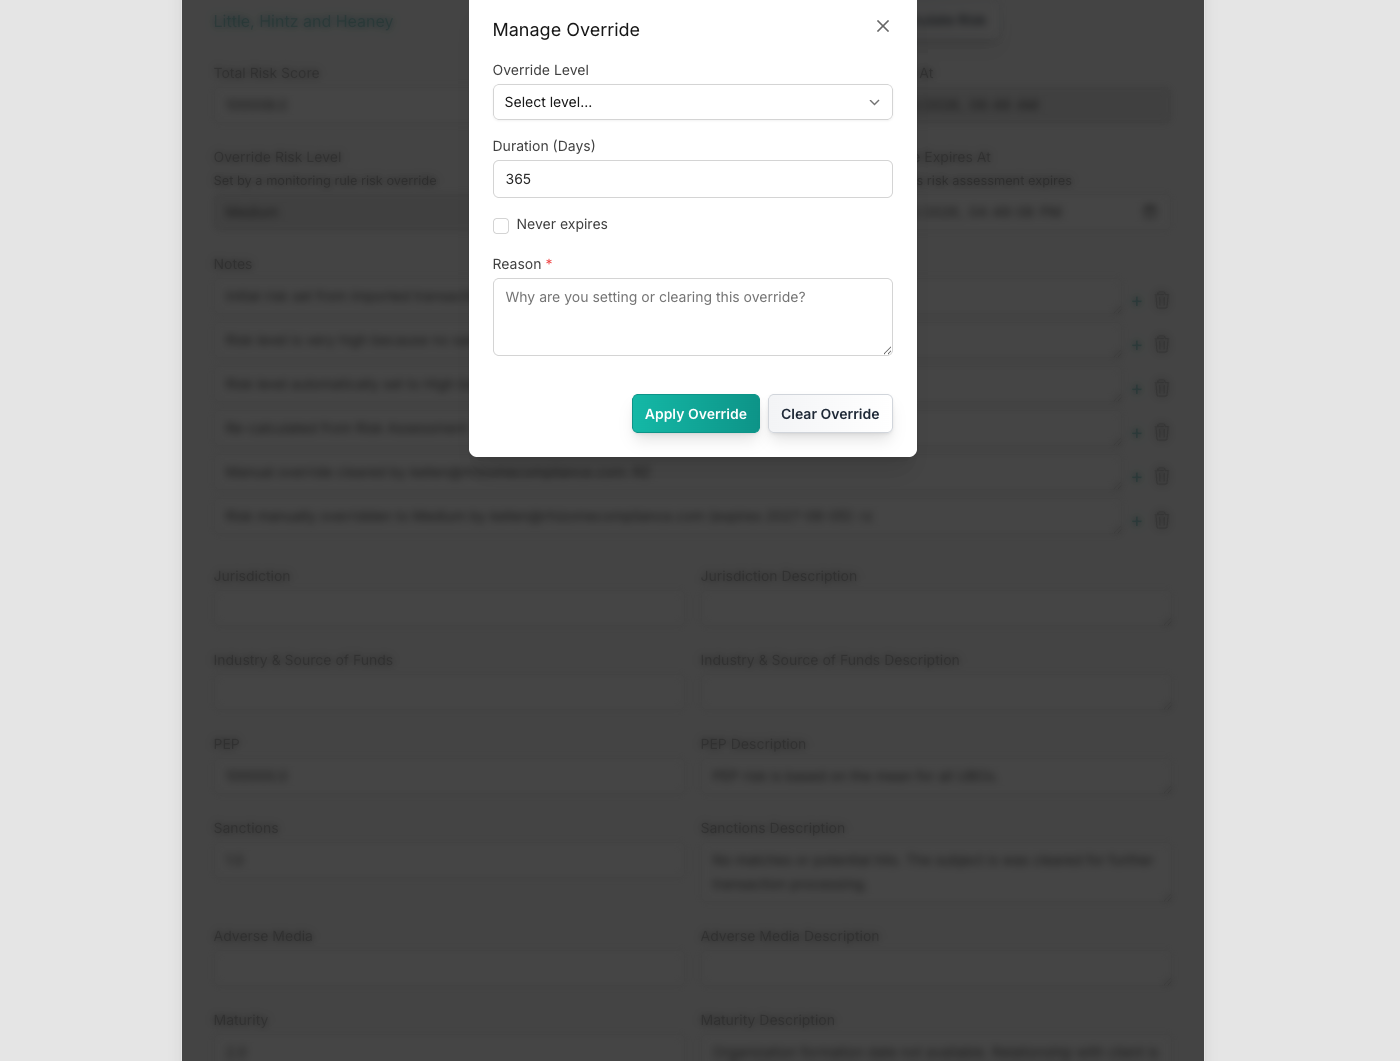
- Click Set Override to open the override modal
- Select an Override Level: Low, Medium, or High
- Enter a Duration (Days) — defaults to 365
- Optionally check Never expires to create a permanent override
- Provide a Reason (required) explaining why the override is being applied
- Click Apply Override
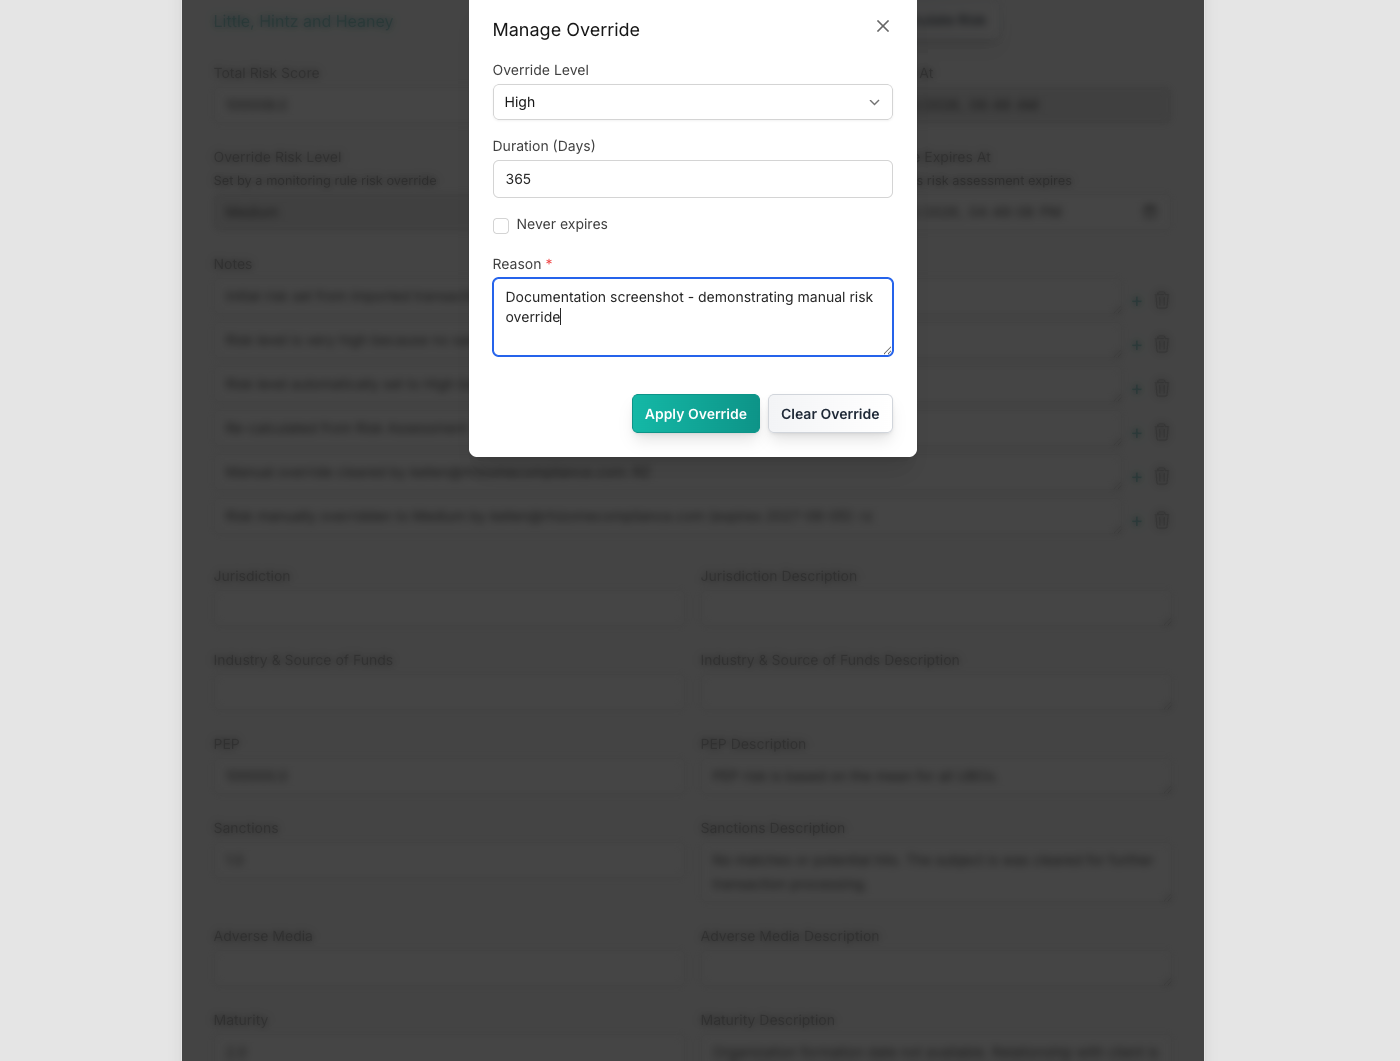
The override creates a new Risk Assessment with
override_rule
set to
"Manual Override"
and logs the action in the Notes:
Risk manually overridden to High by user@example.com (expires 2027-01-01):
    Reason given
Behavior
- Manual overrides are preserved across automated recalculations, just like monitoring rule overrides. The override continues to apply until it expires or is cleared.
- To change a manual override, just set a new one — it creates a fresh Risk Assessment.
Monitoring Rule Overrides
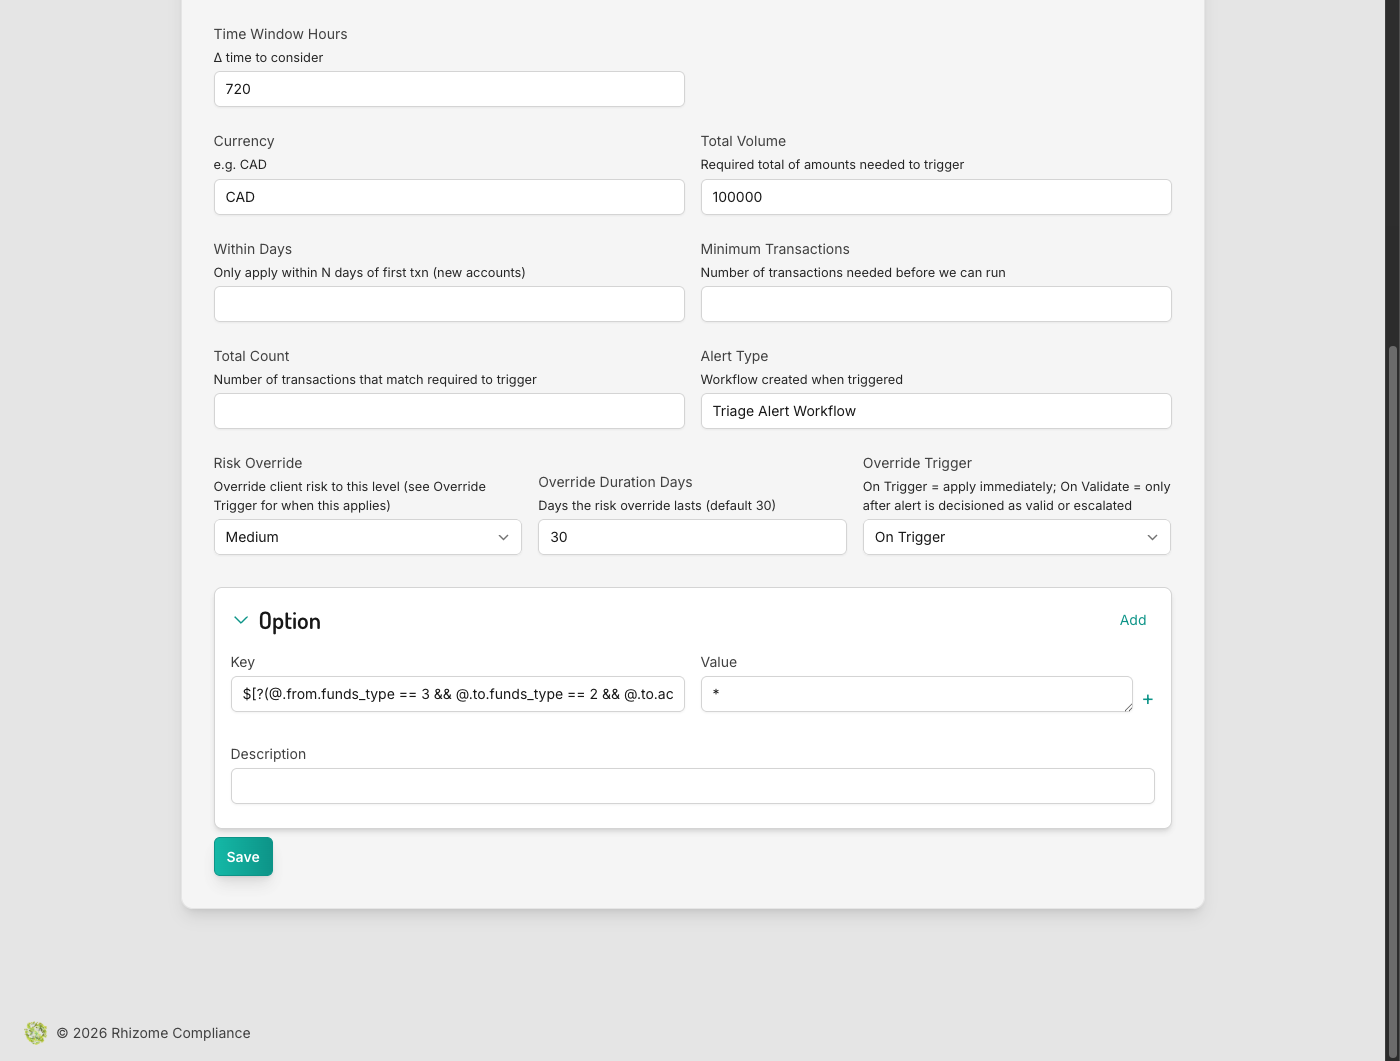
Monitoring rules can automatically override a party's risk level when they trigger. This is configured on each Monitoring Rule via three fields:
| Field | Options | Description |
|---|---|---|
Risk Override |
None, Medium, High | The risk level to override to |
Override Duration Days |
Number | How long the override lasts (default 30) |
Override Trigger |
On Trigger, On Validate | When the override is applied |
On Trigger
The override is applied immediately when the monitoring rule matches a transaction during processing.
- Applied during transaction processing for each transaction party
- If the party already has a higher non-expired risk level, the override is skipped
- If the same rule already created a non-expired override for this party, it is skipped (deduplication)
- Creates a new Risk Assessment with the override level and rule info
On Validate
The override is applied only after an alert is validated or escalated by a user in the triage workflow.
- Triggered when a user clicks Validate or Escalate on a Triage Alert
- Same logic as On Trigger — skips if existing risk is already higher and not expired
- The override note includes "on alert validation" to distinguish it
Override Floors
Certain dimensions can be designated as Override Floors in the Customer Risk Calculation Weights or Entity Risk Calculation Weights blueprints. When a floor dimension's "Override" option is enabled, the overall risk cannot fall below that dimension's rating. If multiple floor dimensions are triggered, the highest rating among them becomes the minimum.
To configure an override floor:
- Navigate to Customer Risk Calculation Weights or Entity Risk Calculation Weights
- For each dimension (Sanctions, PEP, Jurisdiction, Industry & Source of Funds, etc.), check the Override checkbox to make it a floor
- Set the dimension's weight value as usual
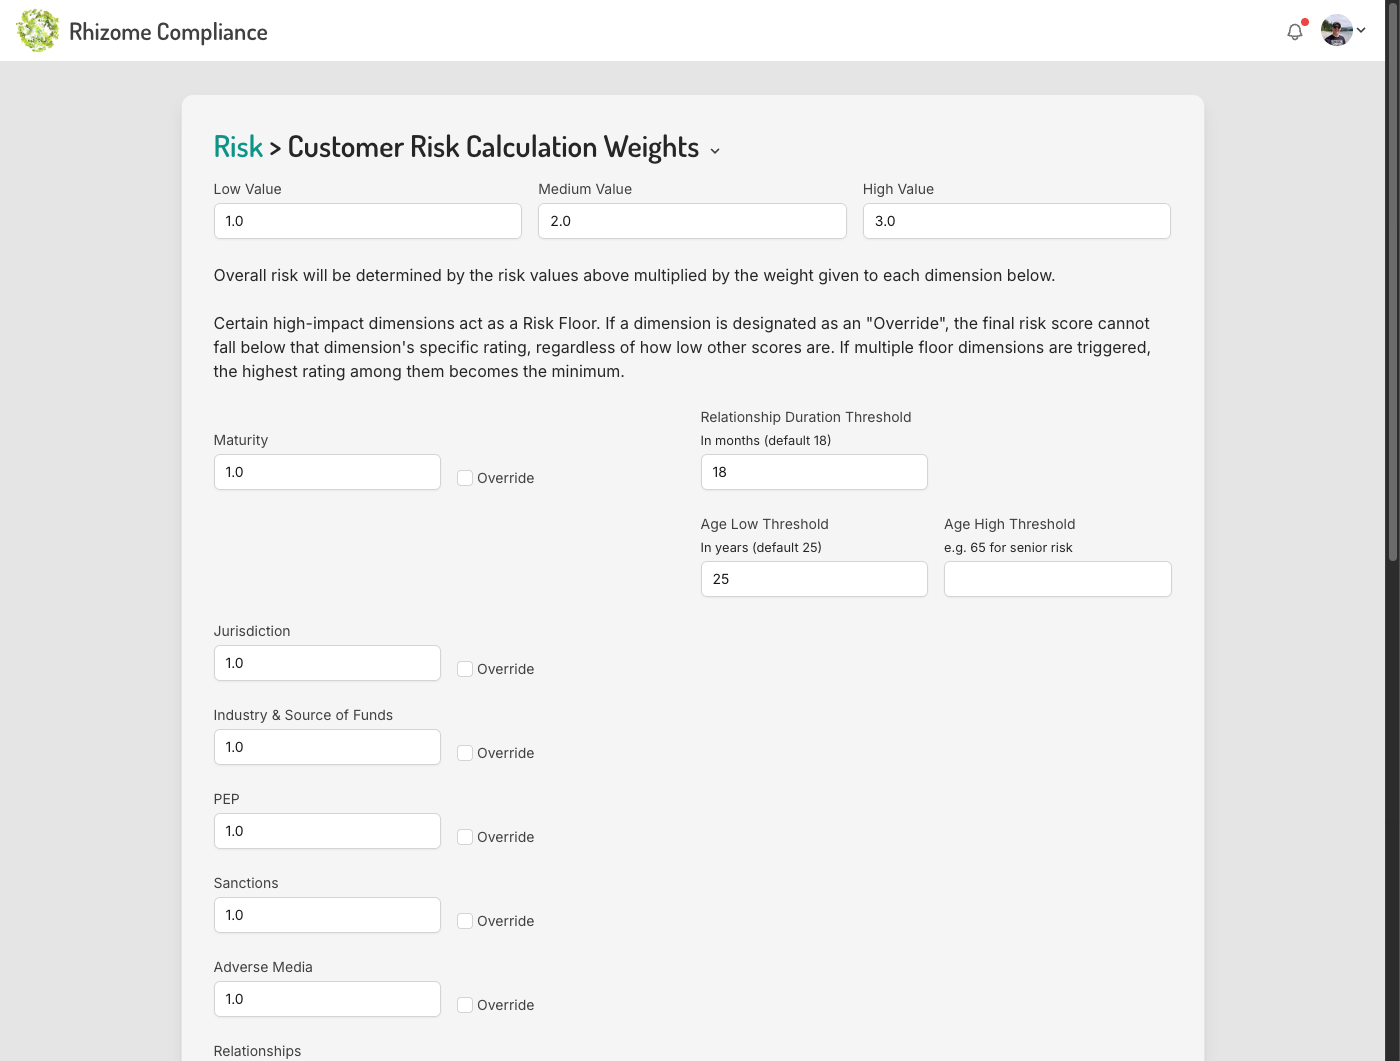
Example: If the PEP dimension is flagged as an Override floor and the sanctions check returns High, the overall risk cannot be Low or Medium — it will be elevated to High, even if all other dimensions score Low.
External Factor Overrides
External Factor Rules can also be configured with an Override flag. When triggered, they force the overall risk to at least the rule's score.
To configure:
- Navigate to External Factor Rules
- Create a rule with a Score (Low/Medium/High), Count (minimum occurrences), and Days (lookback window)
- Check the Override flag on the rule
- Record External Factors on the customer/entity with matching names
When enough external factors exist to trigger the rule and the rule's score is higher than the calculated overall risk, the overall risk is elevated.
Default rules include:
- Law Enforcement Inquiry — 1 occurrence, 730 day window, High (Override)
- Production Order — 1 occurrence, 1095 day window, High (Override)
- RFI Received — 1 occurrence, 365 day window, High (Override)
Initial Risk Import from Transactions
When importing transactions, you can include an Internal Risk Rating field in the transaction data. If present, this creates an initial Risk Assessment for the customer or entity referenced by the transaction.
How It Works
-
The transaction includes an
imported_risk_levelfield (e.g."High","Medium","Low") - During enrichment, if the transaction has a primary (the customer or entity it's for) and no Risk Assessment exists yet for that primary, a new Risk Assessment is created
-
The override is set with
override_rule: "Initial Import", expiry of 1 year from import time, and notes recording the original source risk
This applies risk to both newly created and existing customers/entities. When a transaction creates a new customer or entity (via endpoint signatory data), the initial risk import follows it.
Important
- Only applies if no Risk Assessment already exists for the customer/entity
- The override expires in 1 year by default
- You can change the expiration date after creation (see below)
Changing the Override Expiration Date
The Override Expires At field on a Risk Assessment is an editable calendar/datetime field. You can change it directly on the assessment to extend or shorten the override window.
To change it:
- Open the Risk Assessment for the customer or entity
- Scroll to the Override Expires At field
- Edit the date and time
- Save the step
This is useful when:
- An initial import override is about to expire but the risk profile hasn't changed
- A monitoring rule override needs to be extended while an investigation is ongoing
- A never-expires override needs to be given an actual expiration date
Clearing Overrides
Using the Clear Override Button
- Navigate to the Risk Assessment for the customer or entity
- Click Set Override to open the modal
- Click Clear Override
- Enter a Reason (required) explaining why the override is being cleared
- Submit
What Happens
- Risk is recalculated from scratch based on the underlying dimension scores (PEP, Sanctions, Jurisdiction, etc.)
-
All three override fields (
override_risk_level,override_rule,override_expires_at) are stripped -
The action is logged:
"Manual override cleared by user@example.com: Reason given" - A new Risk Assessment is created with the recalculated risk and no override
Natural Expiration
Automated overrides (from monitoring rules, initial imports, etc.) also clear
naturally when
override_expires_at
passes. The next time risk is recalculated, expired overrides are ignored and
risk is computed from the dimension scores.
High Risk from PEP or Sanctions
When a customer or entity has a High risk level due to PEP or Sanctions screening results, you need to complete the due diligence process for those items.
Understanding the Risk Sources
PEP Risk — comes from the PEP Search step in the Due Diligence workflow:
- For customers: directly from the PEP Search step's risk field
- For entities: calculated as the mean PEP score across all UBOs (ultimate beneficial owners). If a UBO hasn't completed due diligence, a default very high score is used and overall risk is set to High with the note: "one or more UBOs haven't completed due diligence."
Sanctions Risk — from the Sanctions Search step:
-
If risk is
"No match"→ Low risk value -
If risk is
"Match found"→ very high score, making overall risk High - If sanctions check was not completed → very high score with note: "Risk level is very high because no sanctions check was completed."
What to Do
- Create a Due Diligence Workflow if one doesn't exist already. This is the structured process that contains all screening steps.
-
Complete the PEP Search:
- Open the PEP Search step within the Due Diligence workflow
- Click Search to run the automated OpenSanctions API search
- Review the results — the AI analyzes matches and ranks them as Low/Medium/High
- If a match is flagged, a Triage Alert is raised automatically. Decision on the alert: Escalate (creates a new DD workflow for deeper review), Validate, Close, or Snooze.
-
Complete the Sanctions Search:
- Open the Sanctions Search step within the Due Diligence workflow
- Upload a CSV of sanctions records or use the global sanctions index
- Click Analyze Results — AI ranks matches, raising a Triage Alert if a possible match is found
- Recalculate Risk after completing each step — the Calculate Risk step will re-score based on the completed screening results. If the PEP or Sanctions dimension was the only thing driving the high score and the check came back clean, risk will return to normal.
- Finalize the Due Diligence workflow once all steps are complete. The Due Diligence Decision step becomes available only when all workflow steps are done.
Automated Re-checks
After initial due diligence, the system automatically re-checks sanctions and PEP on a schedule based on the customer/entity's risk level:
| Risk Level | Re-check Frequency |
|---|---|
| Low | Every 180 days |
| Medium | Every 90 days |
| High | Every 30 days |
These frequencies are configurable in the Sanctions Screening Settings blueprint. If new matches are found during a re-check, a Triage Alert is raised automatically.